It is that time again. The cheerful day that we all have been waiting for. All of our hard work has seen the light. Well, if you are not sure what I mean, I was talking about the day we published our Intercom Subscription plugin to WordPress.org repo.
For those who are curious, here are the steps we followed to publish our plugin on WordPress.org Plugin Repository:
Table of Contents
1. Check Guidelines
Make sure your plugin follows all the guidelines for the submission. You can read details here:
https://developer.wordpress.org/plugins/wordpress-org/detailed-plugin-guidelines/
These guidelines are pretty straightforward and any normal plugin should pass. We know ours did the first time!
You should also look into how the readme.txt works in any WordPress.org plugin. This is the file that holds all the content that shows up on the plugin page. If you want an example, you can check one for WooCommerce here. You can hopefully figure out everything.
The thing that took me some time to understand is the Screenshots section. You will have to put screenshots as screenshot-1.jpg, screenshot-2.jpg etc. under the /assets directory of the repo. You’ll get a repo later and you’ll understand where to put it. But right now, in the readme, you will correspond to that number and write descriptions for the screenshot:
== Screenshots ==

1. This is a screenshot showing a feature.
2. This is another screenshot showing another feature.
2. Time to Get Approval
Now its time to Submit for approval. Register/Login to:
https://login.wordpress.org/wp-login.php
Your WordPress.org Account page will open up.
Now navigate to https://wordpress.org/plugins/developers/add/ for options for submitting a new plugin. Just zip your plugin and submit. Please remember to give your folder and plugin file a good name before zipping. This will give you a slug for the plugin page URL which cannot be changed.
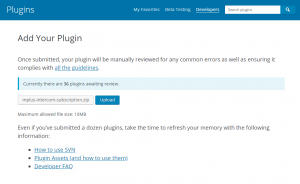
After you submit, a page similar to this will appear.

Now you will have to wait for the approval. It may take up to 10 days or 5 business days to get approved, depending on the queue of other submitted plugins. Ours got approved the next day.
3. After Approval:
When you receive the approval email, you will have to use an SVN client on your machine, such as SVN for Windows to checkout the plugin code:
svn co https://plugins.svn.wordpress.org/your-plugin-name your-local-dir
Then go into the repo directory and keep your plugin content inside the trunk directory. Keep in mind you should not keep your plugin files in a directory. You should keep the files directly under trunk directory. Also, make sure you have trunk as the value to Stable tag: on your readme.txt. Now cd to the repo directory then add the files:
cd /path/to/svn/repo
svn add trunk/*
(On Windows, you use cd /D /some/path to switch to the drive. Sometimes some subdirectories may not get added. If this is the case you should see a question mark beside that file when running svn status. To fix this add --force with the add command: svn add --force trunk/*.)
Please note, keeping your release version under /trunk is ok when your project is simple. But as you grow it is suggested to put the release version under /tags directory under a specific tag and point to the release tag with readme.txt.
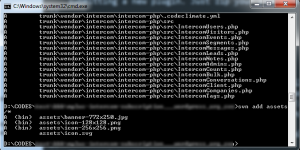
Now add the icons and banner images in assets directory. You can save the banner as banner-772×250.jpg. The dimensions of the banner image should be 772px by 250px, as the name suggests. You can put the icons as icon-128×128.jpg and icon-256×256.jpg and use the dimensions as in the filename. Also add the screenshots as screenshot-1.jpg, screenshot-2.jpg etc.
You can also use png as the extension for icons, banners and screenshots, if you wish. If you have an svg version of the icon, you can include that too as icon.svg. For a hint, you can visit the SVN repository of Hello Dolly plugin.
After adding the icon, banner and screenshot images, run:
svn add assets/*
(Add --force if any file has not been added: svn add --force assets/*.)
Check and double check if everything is as it should be. If not, change the files and add the files again with the commands above.
Then when you are ready, run:
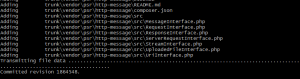
svn ci -m 'Added first version of the plugin'
If failed, try:
svn ci -m 'Added first version of the plugin' --username wporgusername --password wporgpassword
We had some special characters in our passwords, so we had to add quotation marks around our password. Something like this:
svn ci -m 'Added first version of the plugin' --username wporgusername --password "wporgpassword"
Eventually, you should see the checkin/commit to be finished:
Now there you have it. We got our plugin published with these simple steps. If you are curious, visit our plugin page here. You can also install it by searching for “mplus intercom” from WP Admin – Plugins – Add New of any WordPress installation.
Next time you have some changes, use svn add and then svn ci to commit the changes. Don’t forget to update the version number on readme and plugin file header. This will automatically generate your plugin zip file and push updates to user.
Remember, once your plugin gets published, you should apply changes to the repo moderately because they have an automated process that generates the plugin zip file automatically. It may create stress on their end if you frequently commit. Also, users will be annoyed if you push updates frequently.
Remember, once your plugin gets published, you should apply changes to the repo moderately because they have an automated process... Click To TweetWell, that’s about it. This is a glorious time for all of our teammates. We are eager to contribute more plugins to the WordPress plugin repository in future.
Till then, cheers! Have a good life!